This guide walks through how to configure Specify so that you can export Collection Object Attachment URLs from your Specify Attachment/Asset Server that can link to your images when sharing data internally or with data aggregators. These instructions can be adapted to work with any table’s attachments.
You must have the Specify Asset Server configured and publically accessible. To see if this is the case, try to view several Specify attachments in your web browser.
Specify 7 Instructions
- In App Resources, go to the
DataObjFormattersresource present in the collection or discipline you are configuring this for. This is most likely under your discipline. See an example.
In the format section, add the following XML snippet:
    <format
        name="CollectionObjectAttachment"
        title="CollectionObjectAttachment"
        class="edu.ku.brc.specify.datamodel.CollectionObjectAttachment"
        default="true"
        >
        <switch single="true">
            <fields>
                <field sep="http://biimages.biodiversity.ku.edu/static/Ichthyology/originals/">attachment.attachmentLocation</field>
            </fields>
        </switch>
    </format>
- Replace
http://biimages.biodiversity.ku.edu/static/Ichthyology/originals/in the above XML snippet with the base URL for your attachments.
For example, here is another URL for an attachment:
https://demo-assets.specifycloud.org/fileget?coll=sp7demofish&type=O&filename=sp62280762705929643056.att.JPG&downloadname=DDB13-16b.JPGI can safely remove everything following the
filename=as that is where theAttachmentLocationinformation is located.I would replace
http://biimages.biodiversity.ku.edu/static/Ichthyology/originals/with
https://demo-assets.specifycloud.org/fileget?coll=sp7demofish&type=O&filename=`
Note: Replace ampersands (
&) with its XML equivalent,&.
As you may have known, the
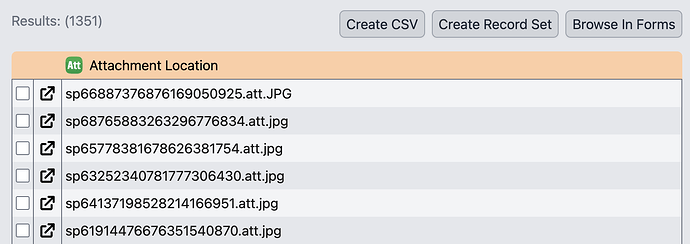
AttachmentLocationfield contains the actual name given to the attachment by Specify when it is added to the asset server:By establishing this format, we are making it so that this is added to the end of the attachment base URL so that the images can be linked to from external sources (GBIF, iDigBio, etc.).
- In the aggregator section, add the following XML snippet:
    <aggregator name="CollectionObjectAttachment"
                title="CollectionObjectAttachment"
                class="edu.ku.brc.specify.datamodel.CollectionObjectAttachment"
                default="true"
                separator=" | "
                ending=""
                count="0"
                format="CollectionObjectAttachment"
                orderfieldname="ordinal"
               />
-
In the Schema Config tool, navigate to the
CollectionObjectAttachmenttable:ex. https://sp7demofish.specifycloud.org/specify/schema-config/en/CollectionObjectAttachment/
Once there, choose both the
CollectionObjectAttachmentaggregation and format.
- Click Save in the top right of the schema config window, clear your cache, then run a query! You should now see the format and aggregation in action!
Specify 6 Instructions
-
Go to System → Schema Configuration…
-
Select the locale of your choice and click Edit a Schema.
-
Go to
attachmentin the Tables list, then make sure you have unhiddenAttachmentLocationby unchecking the “Hide Field” check box. -
If it was hidden, click OK and repeat steps 1-2 to return to the Schema Configuration tool. If it was already unhidden, proceed.
-
Go to
collectionobjectattachmentin the Tables list, then click on the … button next to the Table Fomat pick list. -
Click on the
button in the bottom right of the dialog.
-
Create a new table format that has the beginning of your attachment URL before the
AttachmentLocationfield. Make sure to give it a name and a title.You can find the base URL for your attachments by going directly to an attachment in your web browser and copying the URL.
As you may have known, the
AttachmentLocationfield contains the actual name given to the attachment by Specify when it is added to the asset server:By establishing this format, we are making it so that this is added to the end of the attachment base URL so that the images can be linked to from external sources (GBIF, iDigBio, etc.).
For example, here is a URL for an attachment:
http://biimages.biodiversity.ku.edu/static/Ichthyology/originals/sp64880800553830292016.att.JPGYou can see that the URL can be constructed in Specify by adding the
AttachmentLocationvalue to the end of the static portion. -
Still under
collectionobjectattachmentin the Tables list, click on the … button next to the Table Aggregation pick list.
-
Click on the
button in the bottom right of the dialog.
-
Create a new table aggregation by selecting your newly created format as the Display and then adding a separator of your choosing. Make sure to give it a name and a title.
-
Finally, choose both the newly created format and aggregation for the
collectionobjectattachmenttable! Click OK to save your changes.
Now when you run a query, you can see the the results showing with the URL you configured! Even better, mutliple URLs will be aggregated in one field with the separator of your choosing so that you can export a link to all attachments associated with your Collection Objects!


