This guide walks through the process of creating a new Taxon tree in an existing collection which can be used with Collection Object Groups.
You can add a new Taxon tree to an existing collection for use with the Collection Object Groups mechanism to enable the concurrent management of different “object types” within the same collection.
[!note]
- Taxon trees created using this mechanism are only available within a single discipline.
- At this time, new Taxon trees created in this way cannot be used for Host Taxon.
Creating a new Taxon Tree
-
Log in as a user who is set to be an Institution Admin (more information)
-
Switch to the collection you would like to add a tree to
-
Navigate to your Taxon Tree using the
 Trees button in the navigation menu.
 -
Click on the green
 (plus) icon to the right of the
  (pencil) icon next to the name of your tree (usually “Taxon” or “Taxonomy”).
 -
Select from one of the default tree structures as a starting point or select ‘Empty tree’ at the bottom to create a custom one.


[!Note]
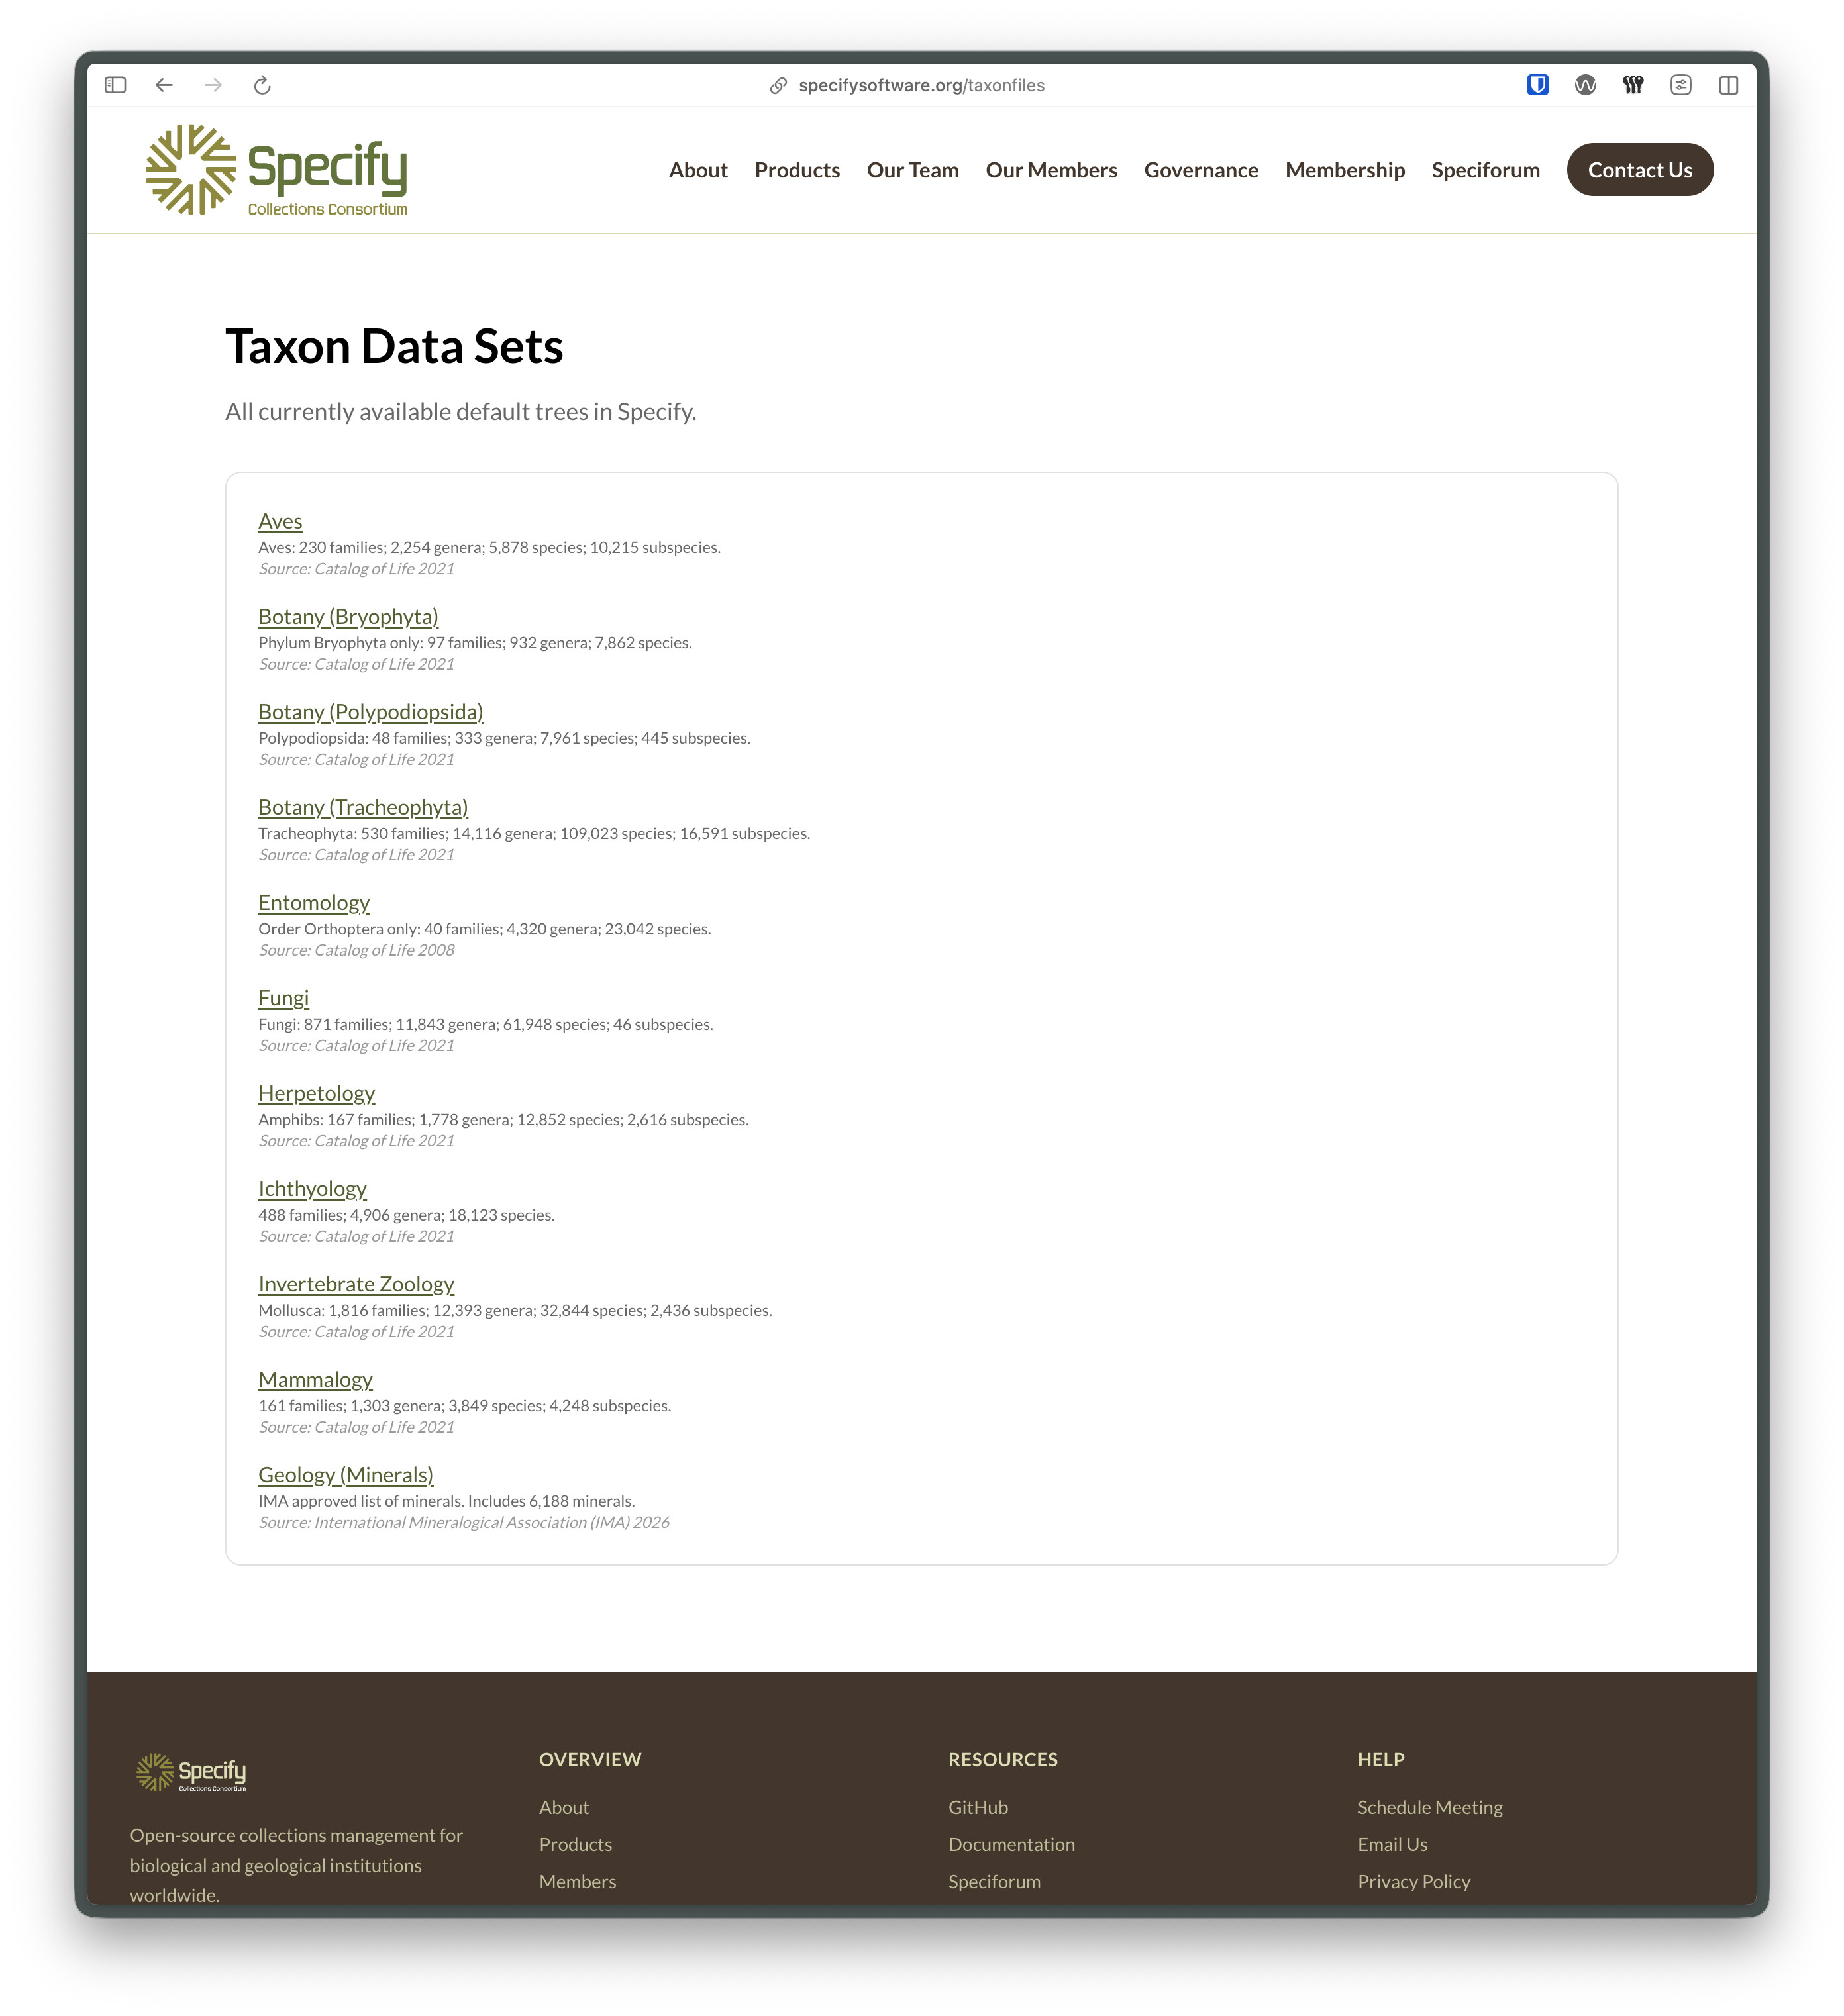
The trees under the heading Populated Trees contain the actual taxonomic data, whereas the trees under the heading Empty Trees are entirely empty aside from ranks. You can obtain source tree data from our website (Taxon Files), GBIF, WoRMs, or other sources.
- For an empty tree, customize the tree definition items to your liking, noting that you cannot add ranks until the tree is created. For a populated tree, a tree creation dialog should appear with a progress bad


-
Once you click Save, your new tree will be created!
-
You can now switch between trees by clicking on the name of the current tree.
-
On an empty tree, to begin adding items to your tree, you need to click on the
under the first rank to create the initial “Root” node. If you want to populate it with default records you can do that as well.
-
Once pressed, the page will refresh and then you will see a new “Root” node present at the top level in your tree! Now you can modify the ranks and definition, add new children to the tree, and begin uploading data using the WorkBench.


To put the tree to use in your collection, you now must create and configure a Collection Object Type to point to your newly created tree!