Trees 
Specify 7 visually presents several data types as hierarchical trees.
Those data types include the information in the Taxon, Geography, Storage (specimen location), Chronostratigraphy, Lithostratigraphy, and Tectonic Unit tables.
These data types are also visualized in forms, but the tree displays offer a more convenient single-screen view of all of the records in the table. Some data tasks are more intuitive and efficient when performed in tree displays as compared to forms.
The Taxon, Geography, Chronostratigraphy, Lithostratigraphy, and tectonic unit trees (and tables) are scoped at the Discipline level, meaning that all collections within a Discipline share the same tree.
Collection Objects in a particular collection though, that are associated with the nodes on what might be a shared tree across two or more collections, will only see the Collection Objects in that particular collection (Linked Collection Objects can be seen by selecting a tree node and clicking the ![]() Search icon in the tools area).
Search icon in the tools area).
The Storage tree is scoped at the Institution level. However, similar to other trees, only the Collection Objects for the current collection will be found when selecting a tree node and clicking the ![]() Search icon in the tools section.
Search icon in the tools section.
You can learn more about data scoping in this topic.
Using Trees
You can navigate to the data trees interface by clicking the ![]() Trees item in the navigation bar.
Trees item in the navigation bar.

Specify Tree Terminology
The various Trees show relationships in a hierarchical structure. The hierarchies are composed of levels or ranks represented by columns in the display. Data values (e.g. taxa) are referred to as “nodes,” and nodes are related to one another in “parent-child” relationships. Nodes within the next rank lower in the hierarchy are referred to as “children.” Every node, except the basal root node, has one “parent” node.
To see the accepted name for a synonym, you can hover over a node in the tree.
Building Ranks
Each tree is visually displayed as hierarchical ranks. Ranks must first be defined in a tree definition, then nodes (data values) can be added.
Tree ranks are initially defined through the use of either the Specify 6 Setup Wizard and the Add a Discipline Wizard.
Editing Tree Ranks
Deleting Nodes
Nodes on specific trees can only be deleted if the following trees are not used in the specified ways:
| Tree | Use |
|---|---|
| Taxon | - not used in a Determination. - not included in a Taxon citation. - not a parent node of a Hybrid. - not a preferred name of a Synonym. - not a parent Node. |
| Geography | - not used in a Locality. - not a preferred name of a Synonym. - not a parent Node. |
| Storage | - not used in a Preparation. - not a preferred name of a Synonym. - not a parent Node. |
| Chronostratigraphy | - not used in a Paleo Context. - not a preferred name of a Synonym. - not a parent Node. |
| Lithostratigraphy | - not used in a Paleo Context. - not a preferred name of a Synonym. - not a parent Node. |
| Tectonic Unit | - not used in a Paleo Context. - not a preferred name of a Synonym. - not a parent Node. |
Before deleting the tree node, you must remove records that prevent the deletion. For instance, to delete an undesired taxon record, you would need to open any associated Collection Object record and delete or reassign the determination.
It is important to remember that the Storage tree is shared by all collections in an Institution and all other trees are shared by all collections within a single Discipline. Nodes that are not being used by your collection may have associations in other collections and therefore can not be deleted.
Tree Actions
| Icon | Action | Description |
|---|---|---|
| Collapse All | Collapse all items in the tree to the root node | |
| Search | Run a query to show associated collection object records | |
| Edit | Edit the selected node | |
| Delete | Delete the selected node | |
| Add Child | Create a new node below the currently selected node | |
| Move | Move the selected node to a new parent (the second node chosen after clicking “Move”) | |
| Move Items | Within the storage tree move all preparations inside one storage node to another | |
| Merge | Merge the selected node with the second node chosen after clicking “Merge” | |
| Synonymize | Synonymize the selected node with the second node chosen after clicking “Synonymize” | |
| Undo Synonymy | Undo the synonymy when clicked after selecting a synonymized node |
Tip: You can select a node without expanding it by holding the
Shiftkey and clicking on a node.
After selecting a node in a tree, the action buttons will become active in the tools area:

Move 
Move a node (and its child nodes) to a new parent. This is useful when a data entry error has occurred, or a new node has been introduced while uploading from the WorkBench. Nodes may be moved between ranks, but enforced ranks may not be skipped.
Bulk Move Items 
Available only in the Storage tree, this tool allows you to move all preparations from one storage location to another in the tree. This is useful if you have a box containing several preparations and want to transfer all of them to a different box.
Select a storage node that contains the preparations you want to move, click “Move Items” ![]() , select the new location to move the items to, click “Move items from {Current Location} here” in the toolbar.
, select the new location to move the items to, click “Move items from {Current Location} here” in the toolbar.
Both storage locations will still exist at the end of this interaction. However, the preparations that previously pointed to the first location should now point to the new one.
Synonymize 
Synonymize the node (in the Geography and Taxon trees only). The node that is selected first will become a synonym of the second node selected. This new preferred node is called the accepting, or target node.
In this instance, I first selected chalumnae, then selected fosteri. After clicking ![]() Synonymize, I confirmed this node synonymization. Now, the node chalumnae is in red and references are now synonymized with fosteri. The target node is then the Preferred node.
Synonymize, I confirmed this node synonymization. Now, the node chalumnae is in red and references are now synonymized with fosteri. The target node is then the Preferred node.
Changes in taxonomy are represented in the fields of the Determinations table. The Taxon and Preferred Taxon fields capture determinations related to Collection Objects.
When a taxon is not a synonym, both fields will indicate the same taxon (A). However, if taxon (A) becomes a synonym of taxon (B), the Taxon field will still show taxon (A), while the Preferred Taxon field will be updated to taxon (B).
By default, you cannot add child nodes to a synonymized node. Similarly, parent nodes cannot be synonymized unless their child nodes are first synonymized. If you would like to change this behavior, please see this guide.
In the Taxon tree, nodes at the species level and below can be synonymized within and between ranks, but any node higher than species can only be synonymized within the same rank. In other words, a family-level node may only be synonymized to another family-level node.
Synonyms are differentiated from non-synonyms by their text color (by default, red). Synonyms also show as a tooltip on the node. Tooltips are displayed by holding the mouse over a rank.
To undo a synonymy, select the node, then click ![]() Undo Synonymy in the menu bar.
Undo Synonymy in the menu bar.

Merge 
Merge parts of the tree. This is typically performed to correct parts of the tree that are duplicated. For instance, if the country of the United States of America were entered as both “United States” and “U.S.” and both included a large number of children (presumably U.S. states), a correction would require many distinct actions.
The ![]() Merge function, however, allows users to combine all the child information and choose the accepted form of a parent. The children of the first node selected (unwanted node) will merge with those included in the node being targeted (remaining node), and the unwanted node will disappear.
Merge function, however, allows users to combine all the child information and choose the accepted form of a parent. The children of the first node selected (unwanted node) will merge with those included in the node being targeted (remaining node), and the unwanted node will disappear.
For example, if the “United States” included the states of Ohio and Oregon and the “U.S.” included the states of California and Hawaii, and the user merged the “U.S.” node into the “United States” node by using the Merge ![]() function, the tree will then have only the United States as a country (parent) with the states (children) California, Hawaii, Ohio, and Oregon. If both nodes originally contain Ohio with various children of that rank (in this case, U.S. Counties), they will be combined into a single node, and all Counties would be accumulated or merged if they were previously redundant.
function, the tree will then have only the United States as a country (parent) with the states (children) California, Hawaii, Ohio, and Oregon. If both nodes originally contain Ohio with various children of that rank (in this case, U.S. Counties), they will be combined into a single node, and all Counties would be accumulated or merged if they were previously redundant.
Select Cancel on the dialog to leave the node in its original position.
Collection Object Counts
Counts are displayed next to the Node as two numbers (X,Y):
- X represents the number of Collection Objects for the Node only.
- Y represents the number of Collection Objects for the Rank and all nodes beneath it.
The last node on the tree will only show the X value, as there are no nodes beneath it.
At the bottom of the tree there is a checkbox that says ‘Show only nodes with associated objects’. With this checked it will only show the records that have some record/object that is linked to them.
For example, in this video, when it’s checked the taxa that had a count of zero disappeared.
Hybrids
Split Tree Viewer 
| Icon | Action | Description |
|---|---|---|
| Split | Split the tree and activate the “Split Tree Viewer” | |
| Switch | Change the split view from horizontal to vertical | |
| Sync | Sync both selected nodes to match the last selected node in the tree |
Split
You can select the ![]() Split icon to split the tree view.
Split icon to split the tree view.
Switch Split Direction
You can select the ![]() Switch icon to switch between splitting the tree horizontally and vertically.
Switch icon to switch between splitting the tree horizontally and vertically.
Sync
You can select the ![]() Sync icon to match the position of the most recently selected node on both sides of the split tree viewer.
Sync icon to match the position of the most recently selected node on both sides of the split tree viewer.
Search
To find a node on the tree, you can use the Search Tree function in the top-left of the tree view. By default, Specify adds a wildcard at the end of a search term.
Chronostratigraphy Chart
You can click on the ![]() (clock icon) to open the International Chronostratigraphic Chart, developed by the International Commission on Stratigraphy (ICS).
(clock icon) to open the International Chronostratigraphic Chart, developed by the International Commission on Stratigraphy (ICS).
Tree Preferences
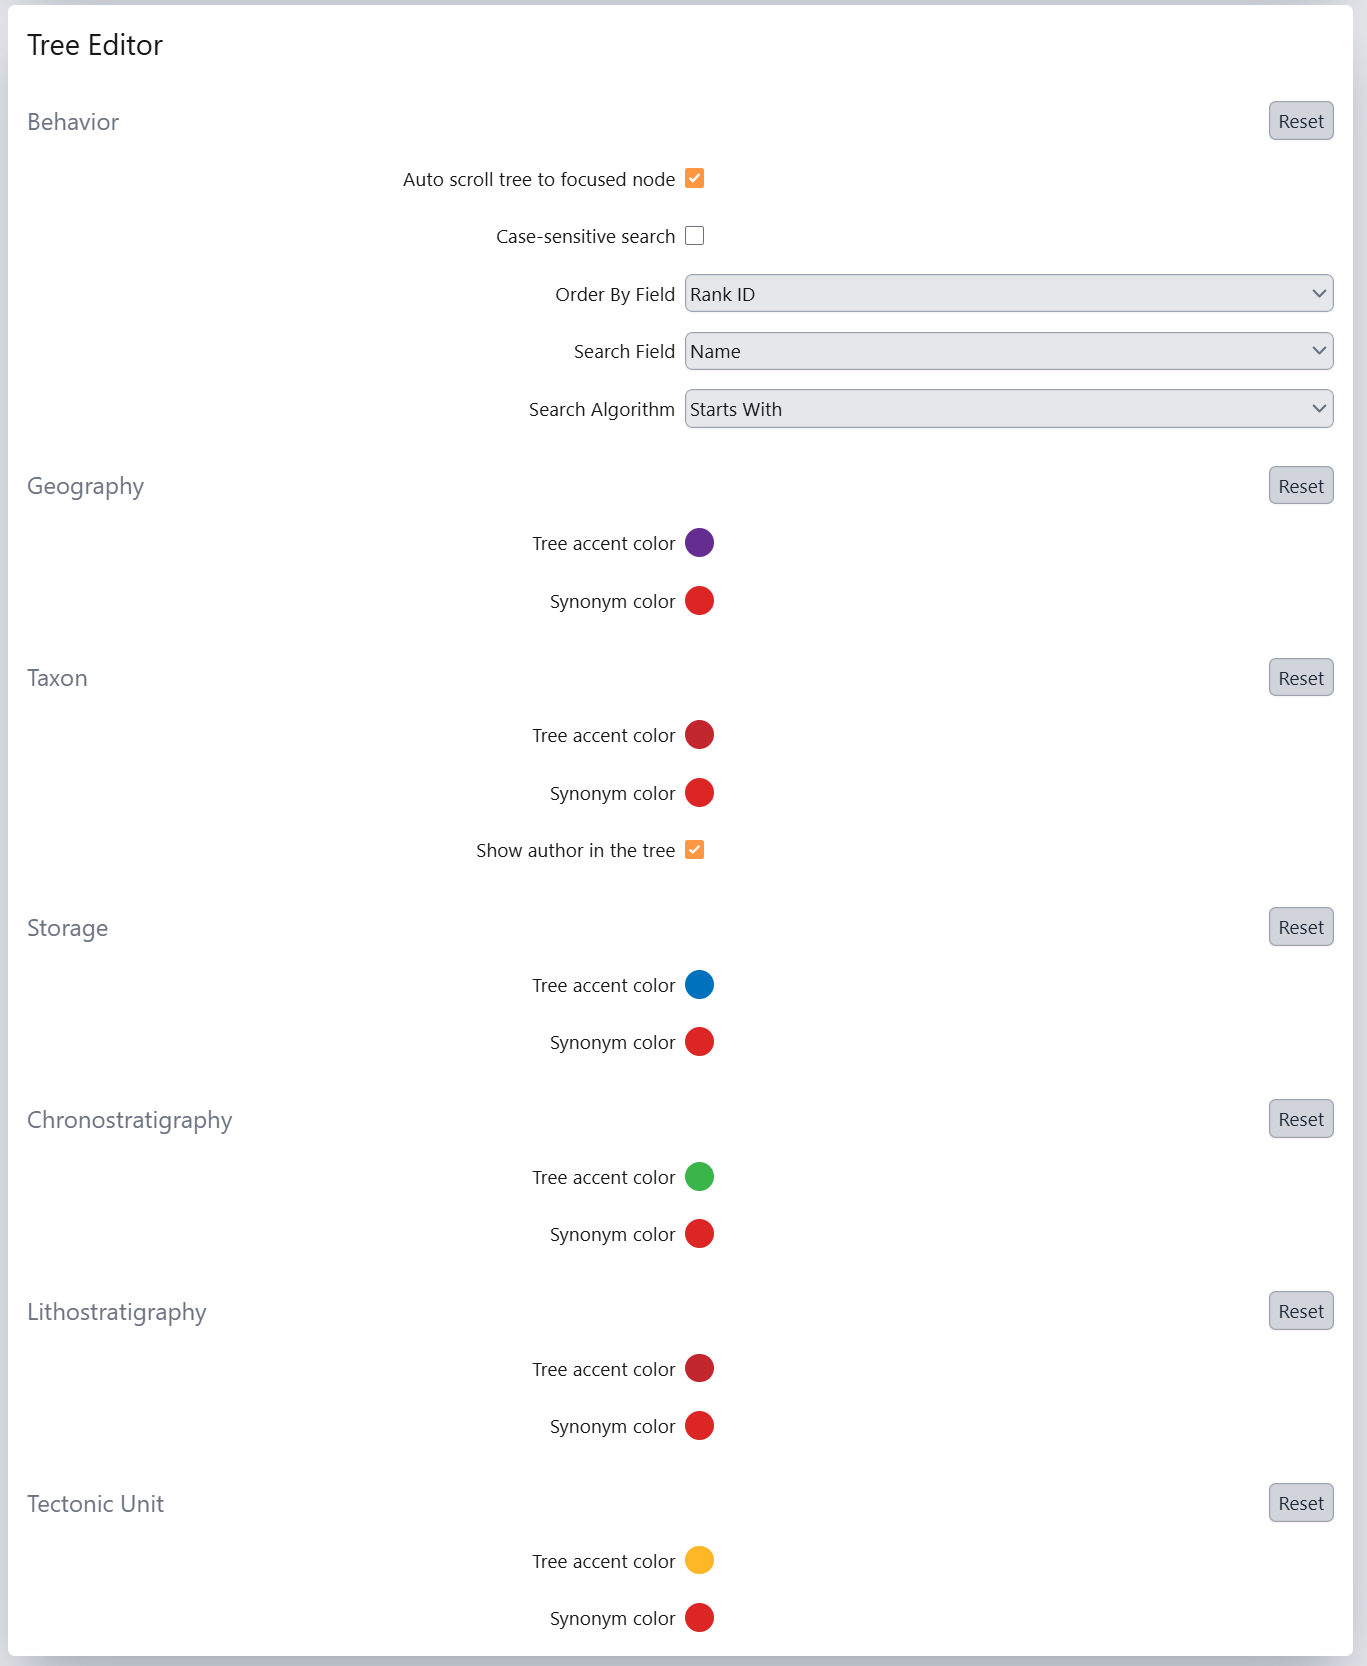
You can customize the tree accent and synonym colors in User Preferences. By default, each tree has an accent color that matches its icon (e.g. Taxon is red, Storage is blue, Geography is purple, etc).
To display authorship in taxon tree(s) check “Show author in the tree.”
You can also configure the auto-scroll behavior for a focused node. You can also configure whether the search function is case-sensitive or not along with the search algorithm. If desired, the search field can be changed to look at the “Full Name” instead of the “Name”.
Tree nodes can be ordered by field to sort the tree based on different fields including: Full Name, Rank ID, Code, and Node Number.
By default, Specify will sort by Rank ID and then alphabetically.

Advanced Options
Instructions for Specify 7.8 and below
Take Actions ( Move, Synonymize or Merge nodes)
Tip: If you are using Specify 7.8 or newer, you can select a node without expanding it by holding the
Shiftkey and clicking on a node.
After selecting a node in a tree, you will see the following in the top right of the tree interface become interactable:
![]()
Move
Move a node (and its child nodes) to a new parent. This is useful when a data entry error has occurred, or a new node has been introduced while uploading from the WorkBench. Nodes may be moved between ranks, but enforced ranks may not be skipped.

Synonymize
Synonymize the node (in the Geography and Taxon trees only). The node that is selected first a synonym of the second node selected. This new preferred node is called the accepting, or target node.

To undo a synonymy, select the node, then click Undo Synonymy in the menu bar.

Note: When taxa are synonymized in the Taxon tree, the Preferred Taxon field on the determination form is updated.
Synonymized node item colors are set in the User Preferences.

Merge
Merge parts of the tree. This is typically performed to correct parts of the tree that are duplicated. For instance, if the country of the United States of America were entered as both “United States” and “U.S.” and both included a large number of children (presumably U.S. states), a correction would require many distinct actions.

Once the node is dropped onto the accepting node, a dialog will appear asking if the user would like to perform the appropriate task; i.e., synonymize the node (when applicable), move the node (when applicable), or merge the node and children (when applicable).
Select Cancel on the dialog to place the node back in its original position.