This guide details the Query Builder, a tool for searching and retrieving data across the database. It walks users through the process of creating a new query, adding fields from related tables, and applying operators (like
Contains,Is Empty, orBetween) to filter results. It covers features such as exporting results to CSV, creating KML files, and generating record sets.
Create a Query in Specify 7 
One of the expected benefits entering data into a structured database is to be able to retrieve the data efficiently and consistently. Specify’s Query Builder offers a flexible interface for defining and running searches. Queries are a precise request for information retrieval and can restrict the returned records based on the contents of any Specify data field.
The results from queries can then be used to create Record Sets or Reports.
Step 1: Click on Queries in your navigation bar.

Step 2: Click on New

Step 3: Select the base table associated with the query you want to make.
The Collection Object table is the one we will use for this example.

Configure Query Tables
The tables available in this menu can be configured by clicking the ![]() button and moving them between the Selected Tables and Possible Tables columns.
button and moving them between the Selected Tables and Possible Tables columns.

Step 4: Select a field from the mapper and click the + button to add it to the query.
The tables that have icons and the > symbol to the right of their name are relationships. In my above example, I chose Cataloger > First Name and Cataloger > Last Name. This is a relationship from the Collection Object base table through the Agent table. This relationship is named in the schema Cataloger.
For Specify 7.6.1 or earlier
In earlier versions of Specify 7, you must click the + to add lines to the query.

For each blank field that you have added, you will have a picklist like this one to pick your fields:

The → to the left of some items indicate that they are tables within your chosen base table.

Because I chose the → Accession # item in the previous list, I now have the fields from the Accession table. For this example, I chose Accession # as the value I wish to query from this list.
Pick all the fields you wish to query as well as every field you want to see the value of associated with your query.

Some tables can be aggregated or formatted, outputting the structure specified in the schema once queried. If multiple formats or aggregations have been defined for one table, you may choose your preferred format/aggregation by clicking the ![]() (gear) icon. Otherwise, the default record formatter indicated in the schema will be used automatically. Learn more about record formatters here.
(gear) icon. Otherwise, the default record formatter indicated in the schema will be used automatically. Learn more about record formatters here.

Fields that have been hidden in the schema will not appear in the Query Builder by default. To temporarily unhide these fields, you can check the Reveal Hidden Form Fields box at the bottom of the Query Builder.
![]()
Step 5: Choose your operators for each field.

These vary for each field; however, these are the major ones you will see in most instances while building a query.
Summary of Operators
| Operator | Explanation |
|---|---|
| Any | Any value from this field is going to result from this query |
| Like | You can insert one of two wildcard characters (% or _) anywhere in a field to narrow a search using character substitution. % represents zero or more characters. For example, d%t will find any word that begins with d and ends with t (dot, dust, dealt, etc.). Tes% will find any word that starts with Tes._ represents a single character. It differs from ‘%’ in that is only ever a single character. c_t will only find words that start with c, contain one of any other character, and end in t (cat, cot). sp____y will find any word that starts with sp, has 4 of any other character, and end in y (specify). The wildcards can be used in conjunction. For example, to find all words that must be at least 3 characters in length: ___%To find all words that start with C and must have at least two following characters, and end with any single character followed by el (such as Caramel): C__%_elMore About Supported Wild Cards and Search Parameters |
| =, >, < | These are equal to, greater than, less than, greater than or equal to, and less than or equal to, and function as expected with your field’s value. |
| Between | Given a Start and End Value, only return results which are in a range from the Start Value to the End Value. For numeric fields, BETWEEN 0 AND 12.23 would allow values 0, 0.111, 6, 12.23, but exclude numbers like -1, 12.231, 100. For text fields, the Start and End Values only match the beginning of the text, and the search is done in a case-insensitive manner. BETWEEN climb AND swim will return words climber, jump, Dance, rest, swan, etc. but NOT return words clamber, clima, swim, tuck, etc. To determine the range, each character is sorted ‘alphabetically’ based on its ASCII decimal value. |
| In | You can create a non-consecutive list that can be separated with commas to be searched. Querying 1,3,5,7 will pull the data for your field when it has a value of any of those entered.If you are using the “In” operator on a field that is based on a Pick List, you can hold down Ctrl ( ⌘ on Mac) to select multiple items from the presented list rather than typing in a comma-separated list of items. |
| Contains | This finds every instance of a specific string associated with that field |
| Starts With | Returns results where the field value begins with the provided string. Available for text, number, and ID fields (but not date fields). |
| Ends With | Returns results where the field value ends with the provided string. Available for text, number, and ID fields (but not date fields). |
| Empty | This will only pull data from items that have said field null/empty. |
| True/False | If the value is true (checked) or false (unchecked), for boolean (checkbox) fields. |
| True or Empty | Returns records where the field is true or null/empty |
| False or Empty | Returns records where the field is false or null/empty |
Additional Operator Tools
Negate
![]() : This icon is the Negate button. When selected, it essentially says that if your search does NOT meet your query criteria, it will appear in your results. For example, if combined with the Empty field operator, the query will only return results for which that field is NOT empty.
: This icon is the Negate button. When selected, it essentially says that if your search does NOT meet your query criteria, it will appear in your results. For example, if combined with the Empty field operator, the query will only return results for which that field is NOT empty.
OR
+: By clicking on the plus (+) button to the left of a field picklist, you can add an OR search term.

This will return all results that start with “Sp*” OR contains “ane”. You can remove this OR component by clicking on the trash can icon.

Timestamp Fields
When querying on timestamp fields (TimestampCreated and TimestampModified), results display both the date and time of the record using ISO 8601 format:
Times are shown using the timezone set for the server.
- Sorting works in both ascending and descending order.
- All standard operators can be applied, including:
-
=, >, < – Compare a full timestamp value.
-
Between – Find results within a specified start and end date/time range.
-
In – Match against a list of specific timestamps.
-
Empty – Return records where the timestamp field has no value.
-
Examples
-
2025-09-04T14:32:10 -
2024-12-15T08:05:45
This allows precise queries and sorting when working with record creation or modification times.
Step 6: Sort and organize your query.
Sorting Your Query
The checkmark button hides or unhides a specific field from the query. This will result in the item either appearing or not appearing once you run the query.
Hidden:
![]()
Unhidden:
![]()
The button on the left is the default state of the sort button. If you press once, it sorts ascending. Twice, descending.
![]()
These buttons will move the field up or down in your mapping. This affects the order in which the field appears once you run the query.
![]()
Simple Query Interface


You can switch to the ‘Simple Query’ interface on any query by clicking on the Basic View button in the ribbon at the top of the page.
You can switch back by clicking the Detailed View button in the same space.
Step 7: Run your query.
Here is our example collection object query.

These options allow you to modify the query’s results:
Count shows just the number of results whereas
Query runs the query and shows the full results including the count
Distinct allows concise queries to pull a list of once-off items (such as geography information or localities) without having duplicate entries. Checking Distinct will take any duplicate records and link them together.
Without Distinct enabled, there will be a lot of individual records, many of which may be duplicates.
When Distinct is enabled, all duplicate records will be linked together. A ![]() (link out) icon will open a new tab to a singular record, as before. However, the
(link out) icon will open a new tab to a singular record, as before. However, the ![]() (slide drawer) icon allows you to view all the duplicate records in a dialog.
(slide drawer) icon allows you to view all the duplicate records in a dialog.
Series:
The series checkbox is only available with collection object as the base table and catalog number needs to be mapped.
If series is checked, any records that have identical fields that are shown in the query, aside from catalog number, will be consolidated into a single row, similar to distinct. For the collection objects to be grouped together they need to have the same values across all fields in the query, and the catalog numbers need to be sequential and the row will display the range of catalog numbers.
Once the query has been run, you will see these 4 options:
Create CSV creates a comma-separated value file that can be used in other programs like Excel.
Create Record Set makes a record set that can be referenced later and used for reports and labels.
Browse In Forms opens up a record set-like interface to browse the query results in.
Depending on the base table and fields included you might also see these 2 buttons:
Create KML creates a Google Earth file from a query that pulls geographic data. See the Google Earth section below for more information.
If record merging is supported for the base table of your query, the following button will also be visible:
Merge Records will open the Merge Records dialog where selected records can be merged into one.
You will also notice in this view that there are 3 options visible in the top right:
Edit Query returns you to the top to modify it from the builder interface.
Save Query saves the current query as it is.
Save As allows you to preserve the original query and creates a new one with all current changes.
Step 8: Save and use your query.
Now that the query is complete, you can save and start using it.

This is an example output when I restrict my query to search Collection Objects using Cat # from 500-504.
All elements can be interacted with and work as hyperlinks to the respective information.
Query Options

Click on the ![]() icon to see the query options.
icon to see the query options.

You can change the name of your query, define a label or report based on your query, or export it in the Darwin Core Archive format.
Here are some example outputs:
Export query for DwCA definition. This is useful for publishing data to aggregators.

Define report based on query or Define label based on query.
Creating Labels and Reports in Specify 7

Name your new label or report. Once you click Create, you will be redirected to the App Resources page.
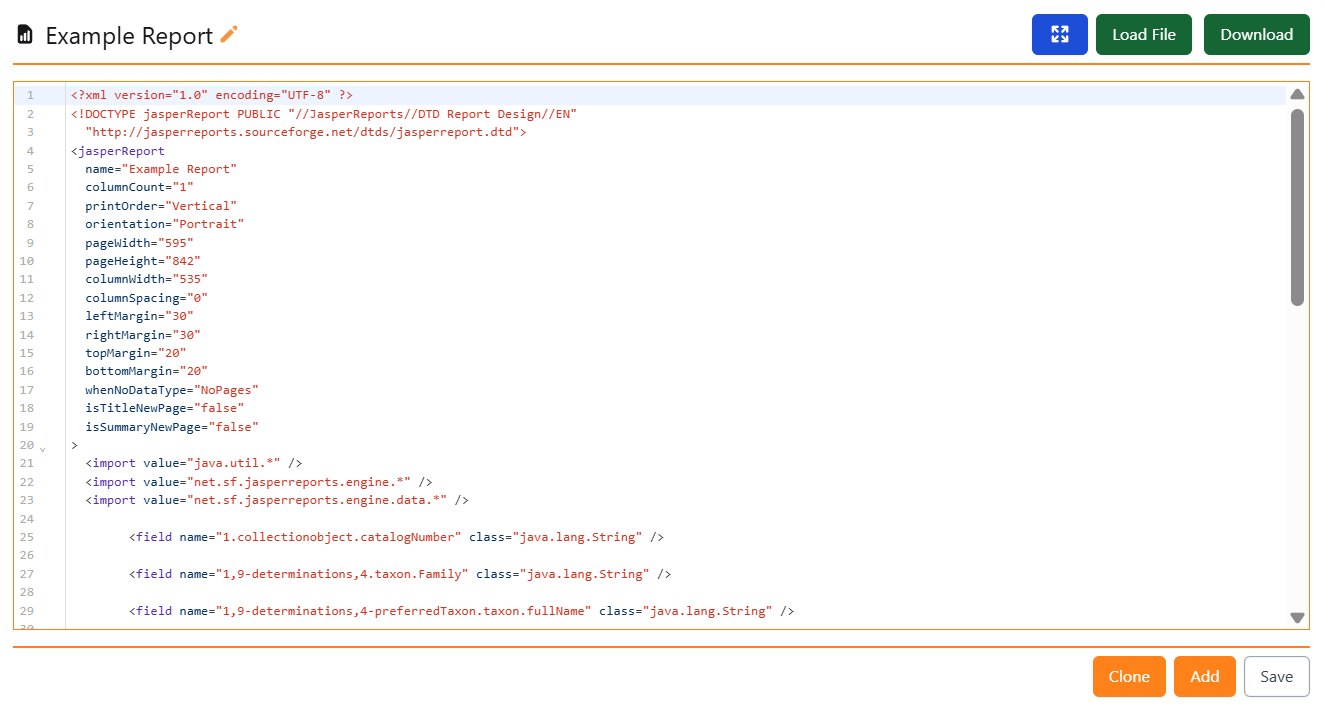
For both the label and report, you can modify the automatically created file within Specify or click Download to save the report to your computer. It will be downloaded in a jrxml file that can be modified in Jaspersoft Studios. You can use the Load File option to reupload it once you have customized it to your liking.
Google Earth
Create a new Locality query, including all the information you wish to export to Google Earth. Once you have the query pulling your desired results, click Create KML.

Your notifications menu will change to orange. Click on it and you will see a query export completed message. Press Download and now you can upload your KML into Google Earth.


Yellow pins will appear at the locality coordinates. You can click on them to recall associated information, and each pin links back to the Specify 7 locality.