This guide describes how to edit the field caption (also known as field label) in Specify.
Terminology
Before beginning, it is useful to have a basic understanding of the Specify database schema and Data Model. From within each instance of Specify, you can access the Data Model Viewer to see all fields, captions, and schema visibility for your particular collection.
| Term | Description | Example |
|---|---|---|
| Field Caption | Known also as the “field label,” this is the user-defined name given to a field in the Specify data model. | Cat # |
| Field Name | The pre-defined system name for a field in the Specify data model. | catalogNumber |
Edit a Field Caption or Description
-
Find which field you would like to edit.
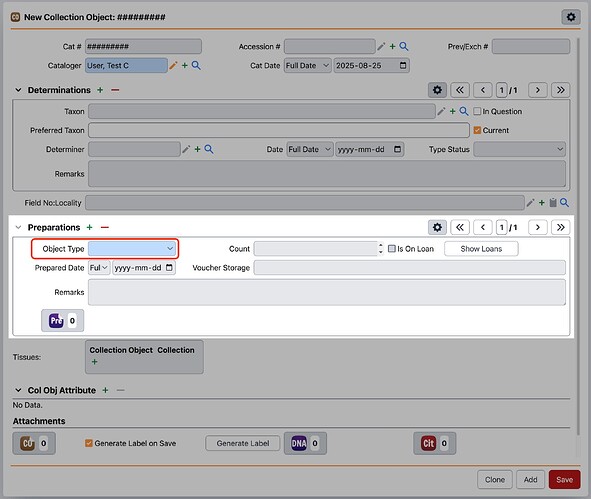
In many cases, you already have the field visible on your data entry form. If this is the case, make sure to identify its position on the form and take note of the current name.
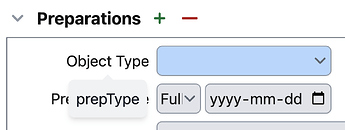
To see the field’s description, you can briefly hover your mouse cursor over the field caption. In this example, the field I wish to edit is shown on the form as “Object Type” and its description is “prepType”.
-
Find out what the underlying Specify data model field name is.
In most cases, this will be similar to the field caption shown on your form, but there are cases where the label you see can say something like
Sexwhile the underlying field name istext1.-
You can click on the
(Form Meta Menu) icon in the top right of any data entry form, click on Form Definition, then you can uncheck “Use Localized Field Labels”.
-
The page will refresh and you can then see the field name rather than the field caption. To see field captions instead of field names again, repeat the steps except check “Use Localized Field Captions”.
-
-
Next, you can proceed to the Schema Config. You can access this by clicking on your
Username in the sidebar navigation menu, opening the User Tools menu, and then selecting Schema Config.
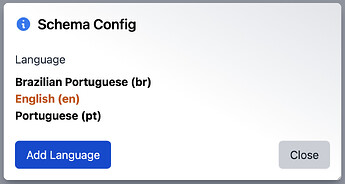
Select the appropriate language (for most instances,
English (en)is the primary customized language).Finally, choose the table that contains the field you are looking to modify.
-
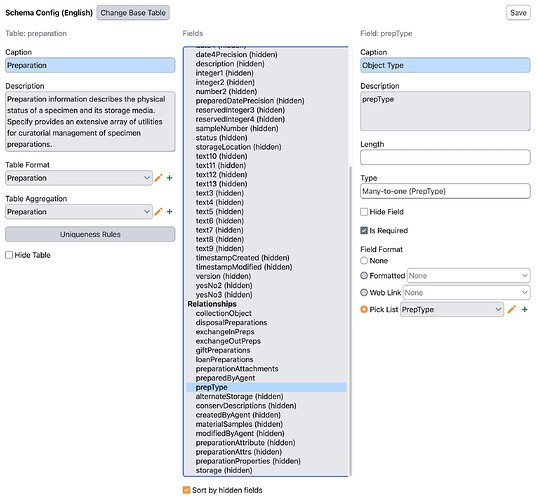
In the list of fields (in the center of the page), find the field name for the field you would like to customize.
In this case, I have selected the
prepTypefield as this is the name of the field I would like to edit the label for.[!note]
While you are here, you can edit many other details of the field, including the controlled vocabulary (Pick List Values) associated with the field, the format the field follows, the web link, field visibility (for Query Builder and Workbench), and more.We strongly recommend reading all about what is possible in the Schema Config documentation!
-
Make your desired changes to the field caption and description.
Once this is done, you can click Save in the top right of the Schema Config page!
-
Now you can return to the data entry form you started on and see the change!
See that hovering over the field caption will show the description added in the Schema Config:

Specify 6 Instructions
- In Specify, click the System tab in the menu at the top and select Schema Configuration… from the drop down menu.
The Schema & Localization Tools window will appear.
- Select your language in the available locales, then click Edit a Schema.
- In the Tables box, click to select the table containing the field caption to be edited. The fields available for the table will appear in a box in the lower portion of the window.
Note: The field names in the fields list are the database names, NOT the caption names. The captions you see on your forms are in the Caption box. The names in the Fields list may not match the field name you see on your form.
- Select the field you wish to edit from the list provided.
- In the caption field in the fields section of the window, enter the new caption.
- To change the description of the field, simply enter the new text in the Description box. The description can be viewed on the forms by double clicking the field name. These can offer helpful hints to new users.
- When you are finished, click OK to save the changes.


