This guide is for those who need to perform a large-scale import of attachments and have access (or a colleague with access) to the server backend.
See also: Uploading Attachments via API
Recap: How Specify Links an Attachment to a File
Before you begin, make sure to review this documentation on how Specify 7 works with the Web Asset Server:
When you upload an attachment in the Specify 7 interface, it doesn’t store the file in the database. Instead, it performs two key actions:
- Stores the File: The file is copied to a designated folder on the Asset Server, and its filename is often changed to a unique string to prevent conflicts.
- Creates Database Records: Metadata about the file is saved in the database. This includes records in the
attachmenttable (containing the new unique filename, original filename, MIME type, etc.) and a “joining table” record (likecollectionobjectattachment) that links the attachment to a specific data record (like a Collection Object).
The link between the database record and the physical file is the attachmentLocation field in the attachment table. Specify uses this value to construct a URL and request the file from the Asset Server.
The Asset Server File System
For more context, see:
If you navigate to the directory on your server where assets are stored, you will typically find two subdirectories: originals and thumbnails.
originals: This folder stores the full-resolution, unmodified files that were uploaded. You can find a specific file here by searching for the filename listed in theattachmentLocationfield in your database.thumbnails: This folder caches the smaller, preview-sized images. You do not need to create these manually. Thumbnails are generated on-demand the first time a user requests a specific size. If a thumbnail of that size already exists, the server sends the cached version; otherwise, it creates it, saves it to this directory, and then sends it.
Mass Importing Attachments via SQL
This section directly addresses your scenario: performing a large-scale import and linking of attachments using CSV files and direct server/database access. For a large number of records , this backend method is vastly more efficient than using the WorkBench or any other frontend tool.
[!warning] Backup Your Database First
This procedure involves direct modification of your database. A mistake could lead to data corruption. Before you begin, please ensure you have a complete and recent backup of your Specify database.
Prerequisites
-
Server Access: You (or your IT colleague) will need shell or SFTP access to the Asset Server to upload files.
-
Database Access: You’ll need a SQL client (like DBeaver) with credentials to write to your Specify database.
-
Your Data Map (CSV): You will create a single CSV file that maps each unique
filenameto the specificCollectionObjectIDof the record it should be attached to. UsingCollectionObjectIDis crucial because it’s a unique identifier, unlikeCatalogNumberwhich can be duplicated across different collections. -
Your
AgentID: You need yourAgentIDto attribute the new records. You can find it with this SQL query:SELECT a.AgentID, CONCAT(a.FirstName, ' ', a.LastName) AS AgentName, d.Name AS DivisionName, GROUP_CONCAT(DISTINCT c.CollectionName ORDER BY c.CollectionName SEPARATOR ', ') AS CollectionsUnderDivision FROM agent AS a JOIN division AS d ON a.DivisionID = d.UserGroupScopeId JOIN discipline AS ds ON ds.DivisionID = d.UserGroupScopeId JOIN collection AS c ON c.DisciplineID = ds.UserGroupScopeId WHERE a.LastName = 'Bentley' -- Change this to your last name or add another criteria GROUP BY a.AgentID, d.Name;The result:
AgentID AgentName DivisionName CollectionsUnderDivision 1514 Andrew Bentley Ichthyology KU Fish Observation Collection, KU Fish Teaching Collection, KU Fish Tissue Collection, KU Fish Voucher Collection The Agent ID for
Andrew Bentleyin theKU Fish Voucher Collectionis1514. Note that this is specific to the division.
Step 1: Prepare Your Linking Data
Before you can create your CSV map, you need to get the correct CollectionObjectID for each CatalogNumber you want to target. This step is vital to prevent linking attachments to the wrong records, especially if catalog numbers are not globally unique.
You can run the following query to export a list of CollectionObjectIDs and CatalogNumbers for your specific collection. You can get this list from within Specify using the Query Builder as well if desired by adding the ID field for both the collection and collectionobject tables.
-- Export CollectionObjectIDs and CatalogNumbers for a specific collection
SELECT
    co.CollectionObjectID,
    co.CatalogNumber
FROM
    collectionobject co
JOIN
    collection c ON co.CollectionID = c.CollectionID
WHERE
    c.CollectionName = 'KU Fish Voucher Collection'; -- <<-- REPLACE with your exact Collection Name
Export the results of this query as a CSV. You can now use this file (for example, in Excel or Google Sheets using a VLOOKUP formula) to match your list of filenames to the correct, unique CollectionObjectID.
Your final, prepared CSV file (e.g. attachment_import_map.csv) should look like this:
filename,collectionobjectid
KUI-1138a.jpg,83451
KUI-1138b.jpg,83451
KUI-1139.jpg,83452
KUI-1140_notes.pdf,83453
KUI-1141.jpg,84001
KUI-1142a.jpg,84002
KUI-1142b.jpg,84002
[!tip]
If you’d like to add custom titles for your files or other metadata, you can add a column here and adjust the instructions below to insert that as well.
Step 2: Upload Attachments & Import CSV
-
Upload Files: Have your IT colleague place all your image and document files into the
attachments/originalsdirectory on the asset server. The filenames must exactly match those in yourattachment_import_map.csvfile. -
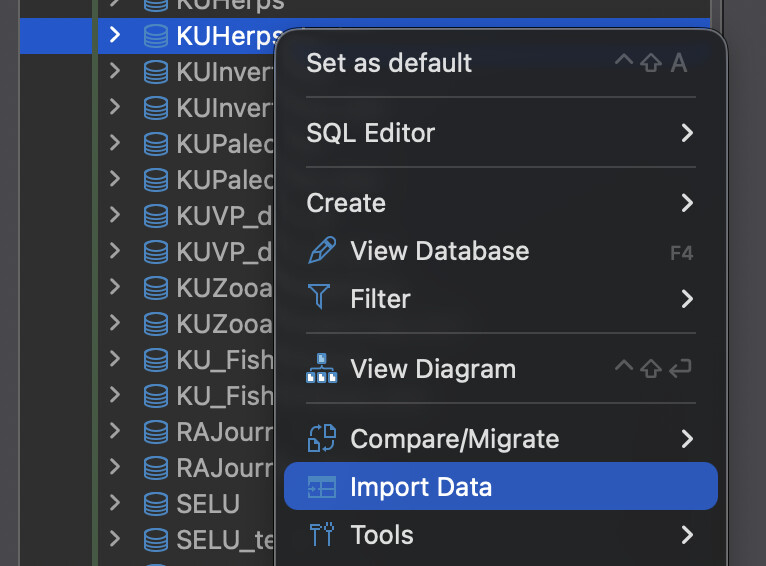
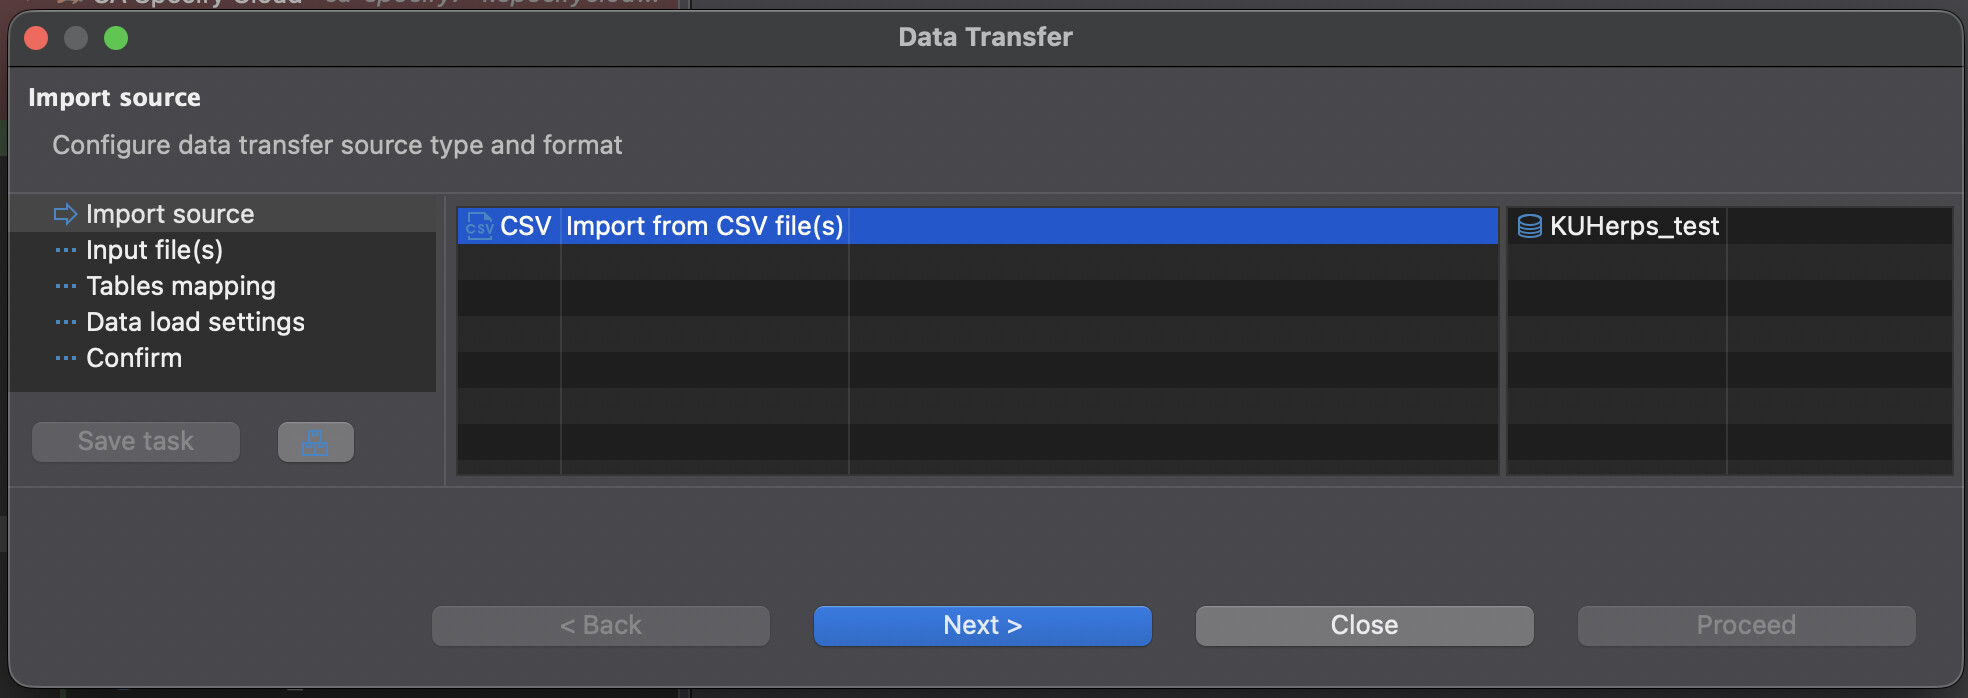
Import CSV to Database: Using your SQL client’s import tool, upload your
attachment_import_map.csvinto a new, temporary table in your database with the same name.This can be done using something like DBeaver, for example:


Step 3: Create attachment Records in the Database
Now, run this SQL query to create the base records in the main attachment table for every file you uploaded. You need to first find the following:
[!help] Table ID
You must find the Table ID for the table you wish to add attachments to. The Table ID for any given table can be found using the Specify Data Model Viewer from within any Specify 7 instance:
Simply find the Table ID for the table you wish to add attachments to (e.g.
collectionobjecthas a Table ID of1).

[!help] Scope Type
For the
ScopeTypefield, you must to set the appropriate scoping for the attachment. This needs to be based on the scope described in the Specify Institutional Scopings article, under the heading Full Table Scoping.COLLECTION = 0 DISCIPLINE = 1 DIVISION = 2 INSTITUTION = 3If I were adding attachments for Collection Object, I would set the
ScopeType=0.
If I were adding attachments to Reference Work, I would set theScopeType=3.
[!help] Collection ID
You need to grab the
CollectionIDfor the appropriate collection and add it to the script below:SELECT CollectionID, CollectionName FROM collection;In my example, the Collection ID for
KU Fish Voucher Collectionis4.
-- This query reads from your temporary table and creates the base attachment records.
INSERT INTO attachment (
    TimestampCreated,
    TimestampModified,
    Version,
    CreatedByAgentID,
    MimeType,       -- IMPORTANT: Adjust if you have mixed MIME types (e.g., 'application/pdf')
    OrigFilename,
    AttachmentLocation,
    TableID,
    GUID,
    ScopeID,
    ScopeType,
    Title,
    IsPublic
)
SELECT
    NOW(),
    NOW(),
    1,
    1514, -- <<-- REPLACE with your AgentID
    'image/jpeg',
    t.filename,
    t.filename,
    1, -- <<-- REPLACE with the Table ID
    UUID(),
    4, -- <<-- REPLACE with your Collection ID
    0, -- <<-- REPLACE with your Scope Type
    t.filename,
    1 -- <<-- Replace with 0 if these should not be public

FROM
    `attachment_import_map.csv` t;
[!help] Default MIME Types
Ensure each attachment in your system uses the correct MIME type.
See MDN’s guide to Common media types for a full reference.Common MIME Types
File Type MIME Type JPEG image image/jpeg GIF image image/gif PNG image image/png TIFF image image/tiff WebP image image/webp BMP image image/bmp Plain text text/plain PDF document application/pdf ZIP archive application/zip Microsoft Word application/vnd.openxmlformats-officedocument.wordprocessingml.document Microsoft Excel application/vnd.openxmlformats-officedocument.spreadsheetml.sheet WAV audio audio/wav MP4 video video/mp4 WebM video video/webm
Step 4: Link Attachments to Collection Objects
This final query creates the link between the new attachment records and the correct collectionobject records using the unique CollectionObjectID from your map.
-- This query links the new attachments to their corresponding collection objects.
INSERT INTO collectionobjectattachment (
    TimestampCreated,
    TimestampModified,
    Version,
    CollectionMemberID,
    CreatedByAgentID,
    ModifiedByAgentID,
    AttachmentID,
    CollectionObjectID,
    Ordinal
)
SELECT
    NOW(),
    NOW(),
    1,
    co.CollectionID,    -- Correctly and dynamically gets the CollectionID from the object.
    1514,               -- <<-- REPLACE with your AgentID
    1514,               -- <<-- REPLACE with your AgentID
    a.AttachmentID,
    t.collectionobjectid,
    0                   -- Sets display order. Can be customized if needed.
FROM
    attachment a
JOIN
    `attachment_import_map.csv` t ON a.AttachmentLocation = t.filename
JOIN
    collectionobject co ON t.collectionobjectid = co.CollectionObjectID
WHERE
    -- This safety check ensures you only link attachments created very recently. Modify if there has been more time between steps.
    a.TimestampCreated > (NOW() - INTERVAL 1 HOUR);
After running these queries, your attachments are fully imported and linked. You can verify this by navigating to one of the records in the Specify 7 interface. Thumbnails will be generated automatically when you view them for the first time.
