This guide explains how authorized users can generate and download a full snapshot of their database directly from the Specify 7 interface. It covers granting backup permissions to specific users, initiating the backup process, and managing or downloading existing backup files.
Authorized users can create a full backup of their database directly from the Specify 7 interface. This provides a simple and secure way to download a complete snapshot of your data for archival purposes, migrations, or peace of mind.
The backup process runs in the background, so you can continue your work without interruption. When it’s finished, you’ll receive a notification and a link to download the compressed backup file.
Who can create a backup?
By default, this feature is only available to users with Institution Admin privileges (learn more in Security and Accounts). However, you can grant permission to any user by assigning them a specific institution-level policy.
To grant backup permissions to a user:
- As an Institution Admin, navigate to Institution > User Accounts from the main menu.
- Select the user you wish to grant permissions to and go to their Policies tab.
- Under “Institution Policies,” click Add Policy.
- Configure the policy with the following settings:
- Resource:
Export - Action:
Backup→Execute
- Resource:
- Click Add and then Save the user profile. That user will now see the Database Backup option in their User Tools menu.
Creating Your Backup
Creating a backup is straightforward.
-
Click on your
Username in the navigation menu to open the User Tools menu.
-
Select
Backup Database.
-
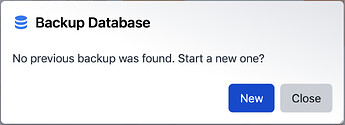
If a backup has never been created, you will see a dialog box that says “No backup has been created.” Click the New button to begin.
-
The backup will start immediately in the background, so you can safely close this dialog.
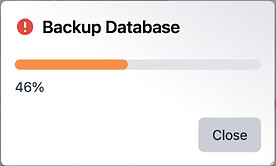
First, you will see a scrolling progress bar indicating the progress of the backup.
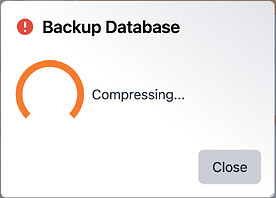
Once the backup is completed, it will be compressed into a
.gzarchive (similar to.zip). -
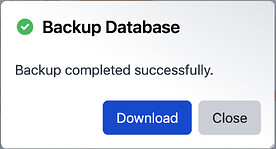
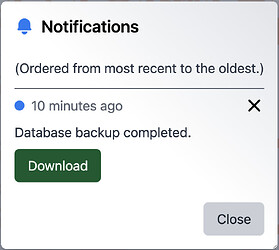
Once the backup is complete, you’ll be notified in two ways:
- A success message will appear in the ‘Backup Database’ dialog.
- You will receive a notification via the
(bell icon) in the main navigation bar.
You can download the backup file by clicking the Download button in either the dialog or the notification. The file will be saved to your computer as a compressed SQL file (e.g.,
your_database_name.sql.gz).The compressed database can be extracted on macOS and Linux by opening the file with the built-in file browser, or on a Windows system by using a tool like NanaZip or 7-Zip.
Managing Existing Backups
The server stores only the most recent backup created with this tool. If you open the Database Backup tool and a backup already exists, you will see its details and have two options:
-
Download: Saves the existing backup file to your computer.
-
New: Starts a new backup process. This will permanently delete the previous backup file on the server and replace it with the new one.
